
vCenter Orchestrator: Operation Automate - Part Four
While learning how to use vCO for automating tasks within my virtual environments I came across the need to auto-generate or auto-populate certain portions of a workflow based on response from a user. To add to my more recent posts (vCenter Orchestrator: Operation Automate - Part 1/2/3) I would like to extend on the idea of the minimal user input idea.
The idea behind minimizing user input is to reduce possible human error from typos or mis-selections. In order to do this with the workflow that we have built together we will need to be able to generate certain things automagically. In this situation, we are wanting to generate the ESXi Host FQDN based off a user inputting the business unit number into the workflow. This may not be the way your company names things but for this example we will assume that a company names their hosts in this manner: _ESXi-
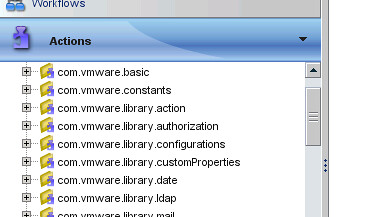
To do this we will use the aid of custom actions within vCO. To do this, let us first create a custom action within the vCO Client. To do this, select the Actions section in your vCO client. Once you expand this, you will be presented with a ton of other actions that were created by the vCO Development team. Here is a screenshot of what you will see:
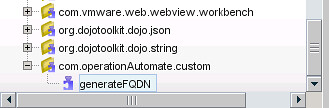
Now, to create one we need to right-click and select New module. Let’s call this module com.operationAutomate.custom. Now that we have a new module, we can add custom actions in this module. A quick note about modules, a module can be used to organize actions. I typically use them to organize actions I create that can be reused in other workflows. Now we need to create a new action. To do this you will right-click on the com.operationAutomate.custom module and select Add action. Let us call this action generateFQDN. Now your new module should look a little like this:
Now that we have the new action, we need to code it to do something. Just like editing a workflow, you will right-click on it and select Edit. Like the good vCO users we are, increment the version and call it the initial version. We will need to add what the input would be that we are going to feed into this action. In this case, we will use businessUnit. To add this, select the Scripting tab, click on the Add Parameter icon and enter businessUnit. Select type of String and enter the Business Unit Number as the description.
Insert the following code into the script editor section of the action:var name = "ESXi-"+businessUnit+".vsential.net";
return (name);
What this will do is add ESXi- to the beginning of the business unit number and then add .vsential.net to the end to generate a fully qualified domain name. Then it returns the variable to the workflow. Now save this action and open up your workflow so we can put this action to use.
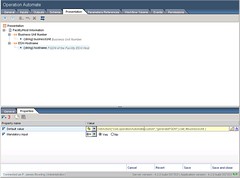
In order to use this action we will need a new input in our workflow. We need the user to enter the Business Unit Number. Select the Input _tab and create the new input parameter. Call it _businessUnit with a type of string and a description of Business Unit Number. Now we need to select the Presentation tab. From here select the hostname variable. We will want to select the Properties tab and click on the Add property icon. This will present you with a selection dialog where we will select Default value. Once this is added, click on the dropdown box under the Value column and select the yellow double arrow. This is to allow us to use an action for this part for the presentation of the workflow. Now click on the puzzle piece icon. This provides us with an action selection dialog. In the search box type generate and hit enter. You will see that the generateFQDN action we created is now listed, as so:
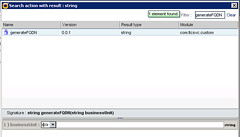
Select the action and automatically the bottom of the dialog is populated with the expected input to the action. In this case, it is expecting the businessUnit input. Click on the pencil icon and select the businessUnit input that we created earlier. This will populate the textbox with #businessUnit, meaning that we are going to pass the businessUnit input to this action. Click apply to complete. You will see that the action is now generated and called like so:
Now we need to save our workflow and validate it. Once we have validated the workflow, run it and watch the ESXi Hostname be automagically populated as you type in the business unit number. Pretty cool, huh? Well, this is a very simple view of what we can do with actions. The possibilities are endless, do you use any custom actions? If so, what are they doing? Post up in the comments and let us know!
Anyway, stay tuned for Part 5 of the Operation Automate series as we dive into the Presentation layer of vCenter Orchestrator workflows. See you back here soon!
Leave a Comment