
vCenter Orchestrator: Operation Automate - Part Three
Now that wait wasn’t so bad, was it? Anywho, today we will look at turning this Visio diagram looking thing into a working automation workflow. In the previous posts we:
- Created the workflow design
- Connected the tasks laid out in the design
- Created the workflow attributes
- Created the single input parameter
- Had a beer…well, at least I did[/list]
So let’s move on…
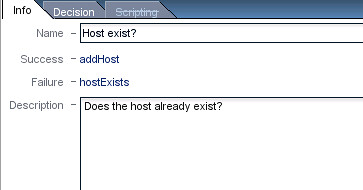
The first piece we will look at today is the Host Exists? task. This is there so we can determine if the host already exists in vCenter. By doing this we can save ourselves some time if it is already there.
The decision tasks are pretty simple to understand as they don’t require any scripting for the basic decision task. One of the best things to do when building your workflows is to make sure that you enter a good description regardless of the task. This enables others who may need to look at your workflow to know exactly what is expected. Moving on…select the Decision task from the Schema view. You can then start to enter information in the lower portion of the vCO client. Enter the information as such:
Next, click on the Decision tab and set it up as follows:
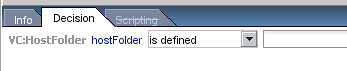
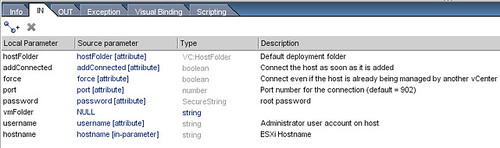
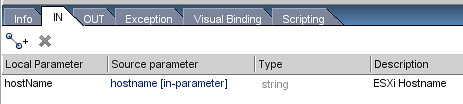
Now to explain what this does…When we set it to check the hostFolder we can tell it to check to see if the host is defined, or in other words, already added to vCenter. It is a pretty simple idea. Now we want set the next task’s information. That would be the addHost task. Select the addHost task from the schema. You will see a few tabs populate at the bottom of the vCO client. As before, we need to add a proper description of the task. Something along the lines of “Task to add the host to vCenter”. Now we want to select the “IN” tab. This is where we will tell the task what inputs/attributes to take in and this will allow you to utilize these inputs/attributes within your scripted code for this task. Select the following:
Now we want to set the following for the “OUT” tab, these will be what parameters the task will output:

Next tab is the Exception tab. This is where we will select the attribute in which to store the exception, if any. You will want to set this to the errorCode attribute that we created in Part 2. The next tab is the Visual Binding tab which gives us exactly that, a visualization of the current bindings associated with this task. Let’s move on to the Scripting tab. To quote the Ladies Man, “…this is where the magic happens.” In this section is where we will place the code to add the host. Select the Scripting tab and place the following code in there:try {
// define default if params is null
if (addConnected == null) addConnected = true;
if (force == null) force = false;
if (port == null) port = 902;
var hostConnectSpec = new VcHostConnectSpec();
hostConnectSpec.force = force;
hostConnectSpec.hostName = hostname;
hostConnectSpec.port = port;
hostConnectSpec.userName = username;
hostConnectSpec.password = password;
if (vmFolder != null) hostConnectSpec.vmFolder = vmFolder.reference;
task = hostFolder.addStandaloneHost_Task(hostConnectSpec, null, addConnected);
}
catch (errorCode) {
System.error("Cannot add host " + hostname + ". Reason: " + errorCode);
Server.error("Cannot add host " + hostname + ". Reason: " + errorCode);
tmpErrorMessage = "Cannot add host " + hostname + ". Reason: " + errorCode;
}
The vim3WaitTaskEnd task is auto-generated for you as far as the INs, OUTs, and Scripting. In this task we want to map the OUT:actionResult to newHost. You would do this by selecting the OUT tab and setting the source parameter to newHost with a type of VC:HostSystem. As with the previous, the exception should be set to errorCode.
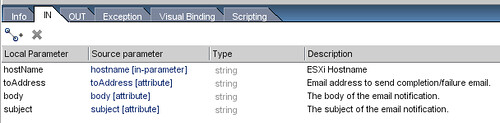
Now we move on to the sendEmail task. Here is where we will incorporate the ability to send a completion or failure email to the specified user in the _toAddress_attribute. I will skip over the Info tab and move to the IN tab. Here we will want to add the following input parameters/attributes:
We aren’t going to set anything in the OUT unless you want to try to catch an exception of a failed send. I am not too worried about this because if it failed to send then it will fail to send the failure…HA…say that a few times fast. Moving to the Scripting tab, we will enter the following code:var myEmailMessage = new EmailMessage();
// Apply methods on this instance that populate the email message
myEmailMessage.toAddress = toAddress;
myEmailMessage.subject = "New Host Added "+hostName;
myEmailMessage.addMimePart(body , "text/html");
// Apply the method that sends the email message
myEmailMessage.sendMessage();
System.log("Sent email to '"+toAddress+"'");
Our workflow is practically finished minus the exception handling. The tasks we created for exception handling follow the same setup as the others so I will just give you a few screenshots and code to add to them as I feel I am getting long winded. This can be repeated with only needing to change the _Scripting_portion of each of the exceptions. Here is the screens and code:

Here is the code for hostExists exception:body = "The host '"+hostName+"' already exists in the vCenter inventory.";
Server.error("OpAuto: "+body);
Here is the code for the addHostFailed exception:body = "Unable to execute addHost_Task(): "+errorCode;
Server.error("OpAuto: "+body);
Here is the code for the timeout exception:body = "Error while waiting for addHost_Task() to complete: "+errorCode;
Server.error("OpAuto: "+body);
We finally come to the last step of making sure we have a working workflow, validation. This is a very important step as it will check for warnings and errors within the flow of the design. This will not catch coding errors and things of that nature as it only makes sure that the flow is correct between tasks. To do this simply click the Validate button at the top of the _Schema_view. If everything goes well you will see the following:
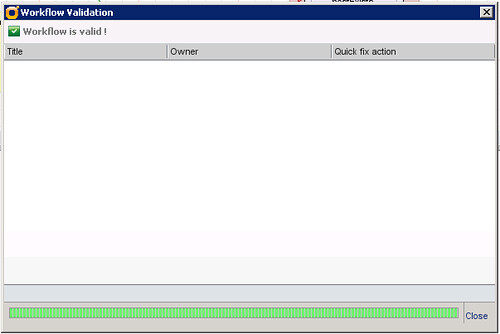
If everything pans out then you can close that window or deal with whatever issues it brings to your attention. I hope that everyone found this series to be helpful in getting them started in vCO. This example is just a simple example of what we can do with vCO. The possibilities are endless and expanding. One thing people will probably ask is, “Why did you do this when there is already a workflow to register a host with vCenter?” My answer to this is simple, I wanted to show the pieces of what makes a workflow and give some insight on how they are used. Plus, not all included workflows do exactly what you want. You can expand on them and create your own, or you can do it from scratch. I personally use a combination of both.
If you have any questions then please feel free to post a comment or hit me up on Twitter (@vSential). And be sure to stay tuned for more vCO examples, in a much shorter form! (I know, I know…thank goodness he isn’t going on another marathon post!)
Update: After looking back, I realized that I am leaving out some key parts considering my methods. I will be posting a Part 4 and possibly Part 5 of the Operation Automate series in the next few days. Sorry about that! We will touch on custom actions and presentation. Stay tuned! Same bat time…same bat channel…
Leave a Comment